AtMail Email Transfer Instructions
The State Library has prepared step-by-step instructions for AtMail email archive and contacts transfer via Thunderbird for Google, Yahoo, and Zoho email services. Click each heading to expand the section and work through the steps.
Setting Up Thunderbird
Set up Email on Thunderbird
Thunderbird is a free email application that’s easy to set up and customize. Click this link to be taken to the Thunderbird download site.
- Download the free Thunderbird App
- Run the installer (setup.exe you just downloaded)
- Select "Yes" to allow the app to make changes to your computer
- Select Next -> Leave as standard and click Next -> Leave the install path as is and decide if you want this as your default email program and click Install
- After it install, cleck Finish to launch it for setting up the necessary email settings.
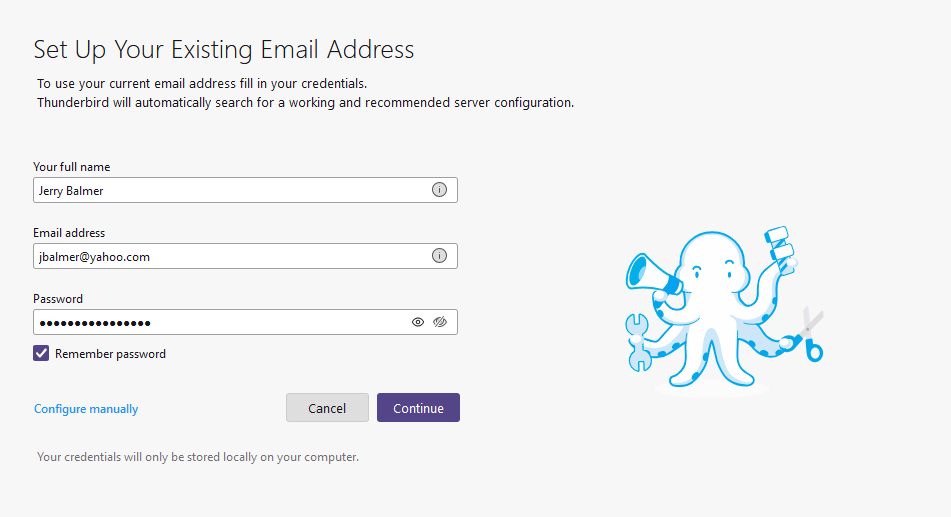
You will see the following page. Fill it out accordingly.

Use your full name, your SILO email address (lib.ia.us address) and then press continue.
Fill out the next page as seen below.
Incoming Hostname: imap.us-east.atmailcloud.com
Outgoing Hostname: smtp.us-east.atmailcloud.com

After filling out the page with the data as seen above, click the <Done> button.
It will run and create your account as seen below.

Your Thunderbird account is now setup.
If you are not seeing your folders, right-click on your account on the left and select Subscribe. Check the folders you want to see in Thunderbird
Setting Up Zoho Mail
Set up a New Email account on Zoho Mail
- Go to the Zoho Mail homepage, fill out the requested information and click Sign-up for free.
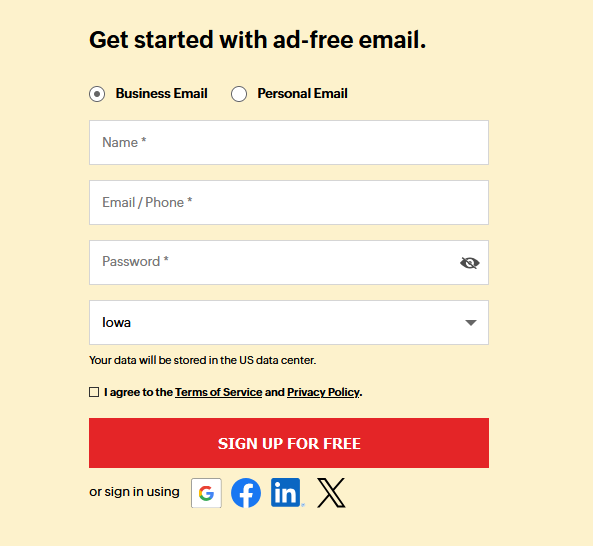
- You will be asked to verify a one time code texted to the phone number provided.
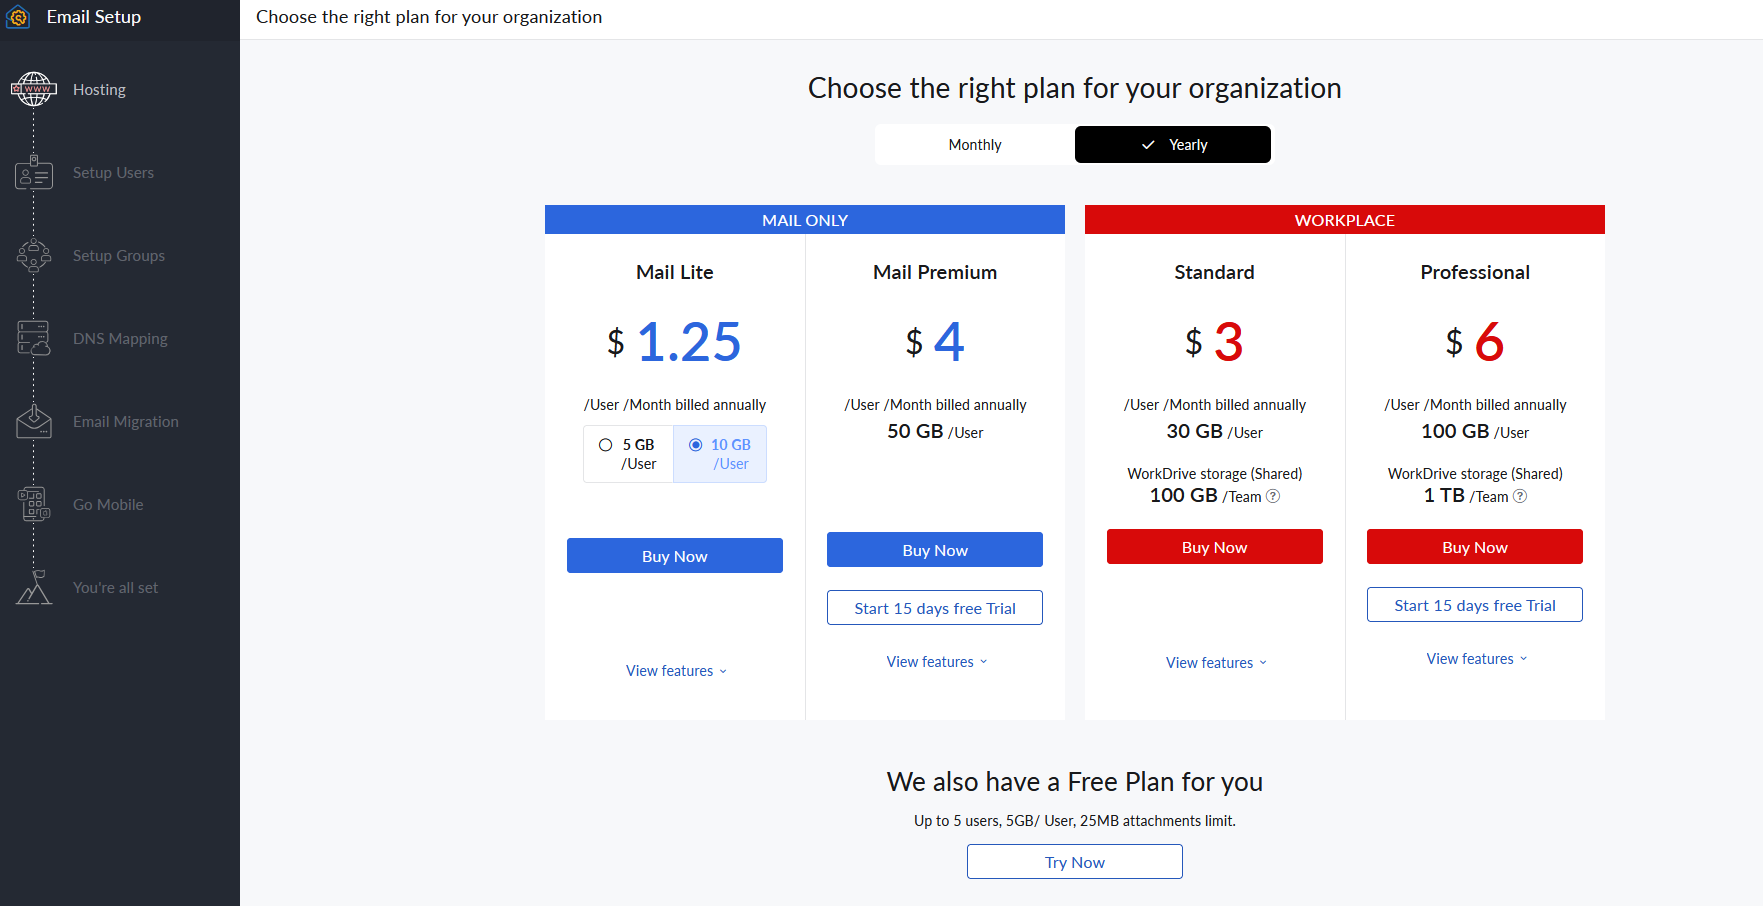
- Zoho Mail offers different plans to suit your needs. Once you choose the plan you prefer, click Buy now for a paid plan or Try now for the free one.
Using your @[cityname].lib.ia.us email address.
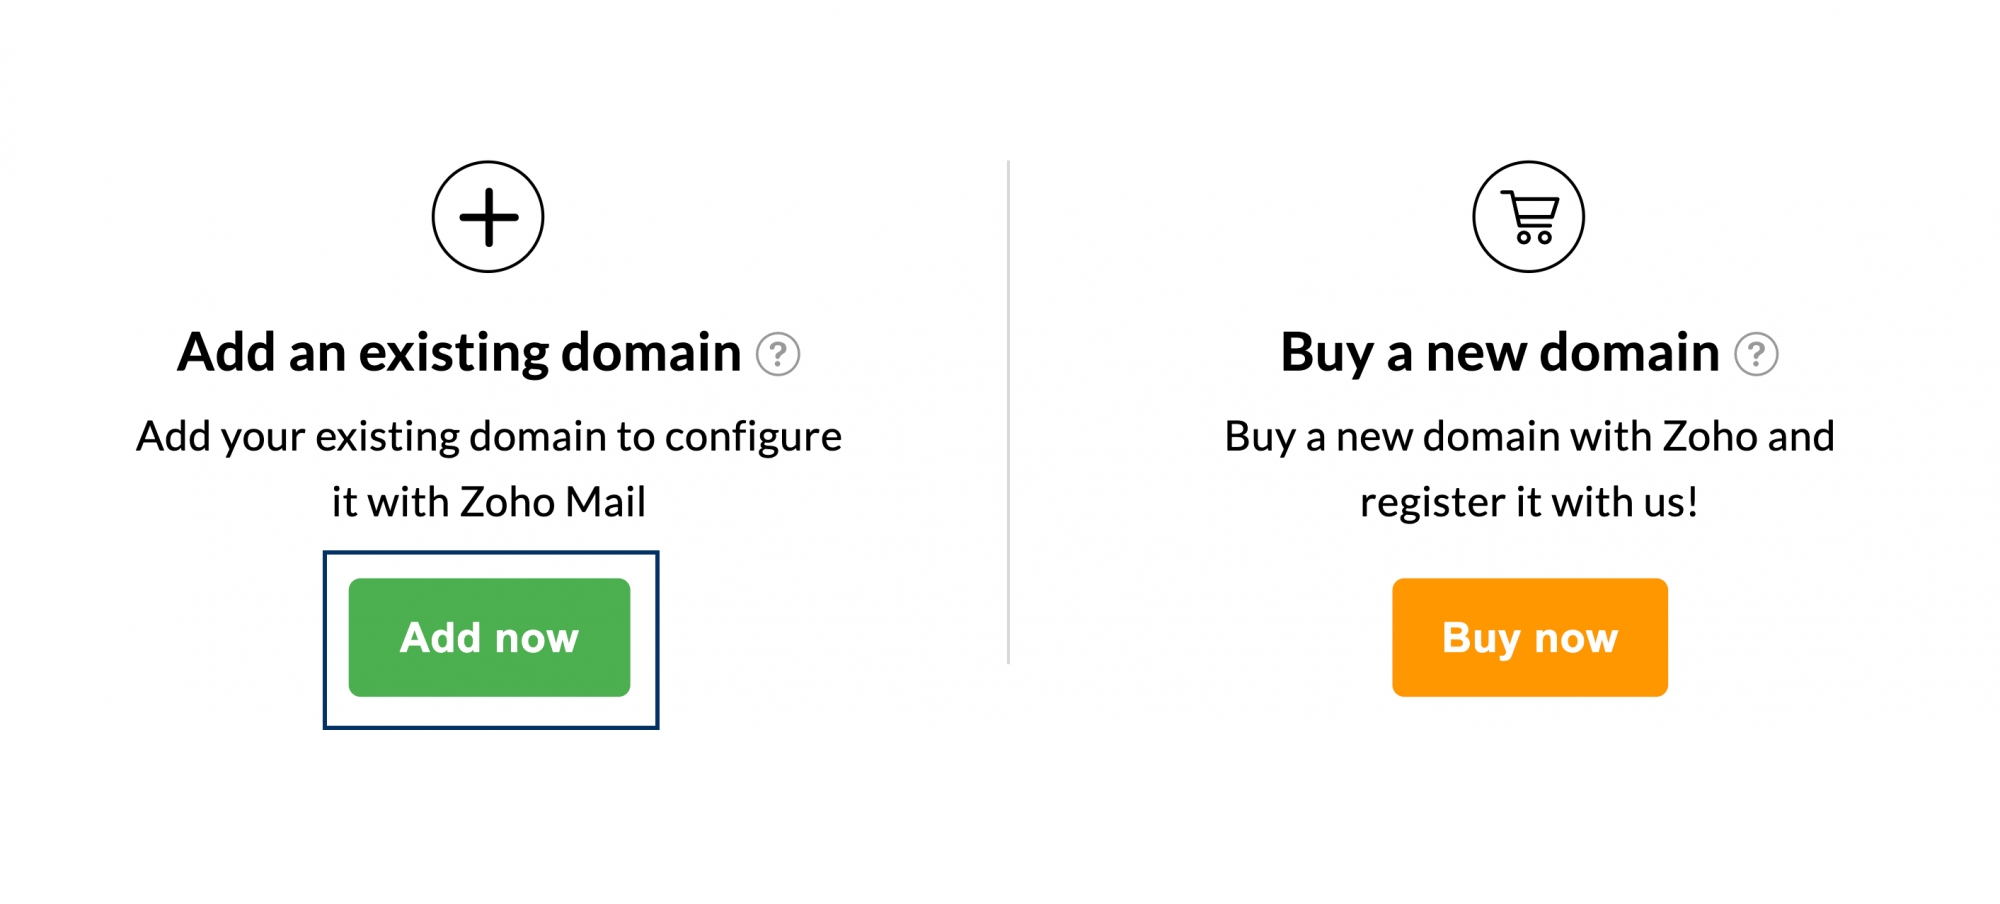
- In the Domain Addition page, click Add now under Add an existing domain section.
- Provide your Domain address ([cityname].lib.ia.us email address) and the name of your organization in the pop-up. The organization name that you provide here will be used for all future references. You can also edit it later in the Admin Console.
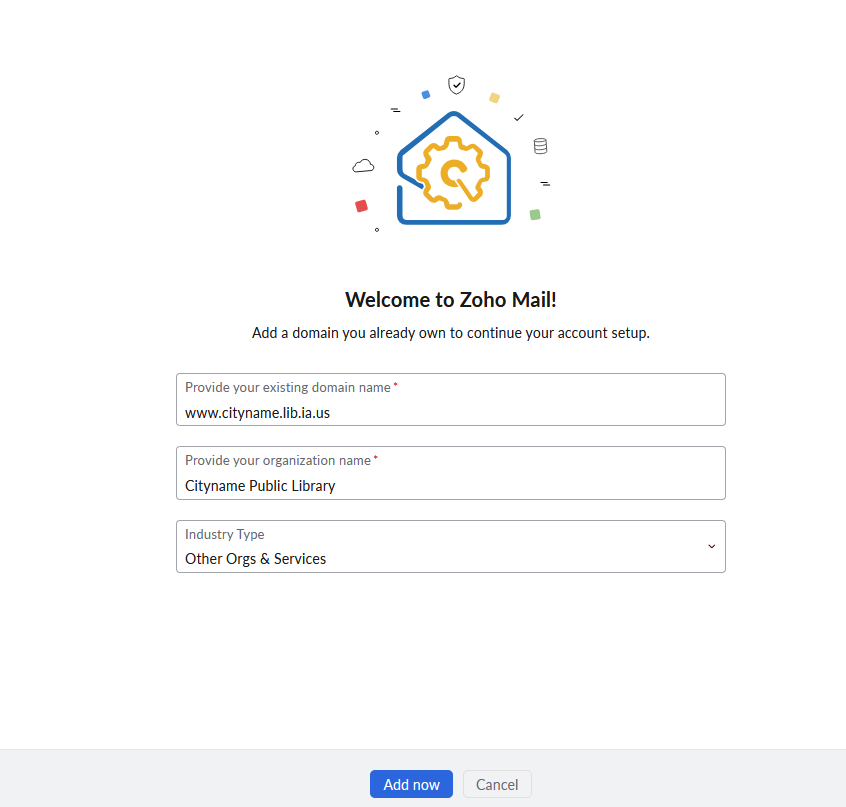
- Once done, proceed by clicking the Add now button.
- You must now provide information to your LRT for us to verify your domain. You will see the screen below
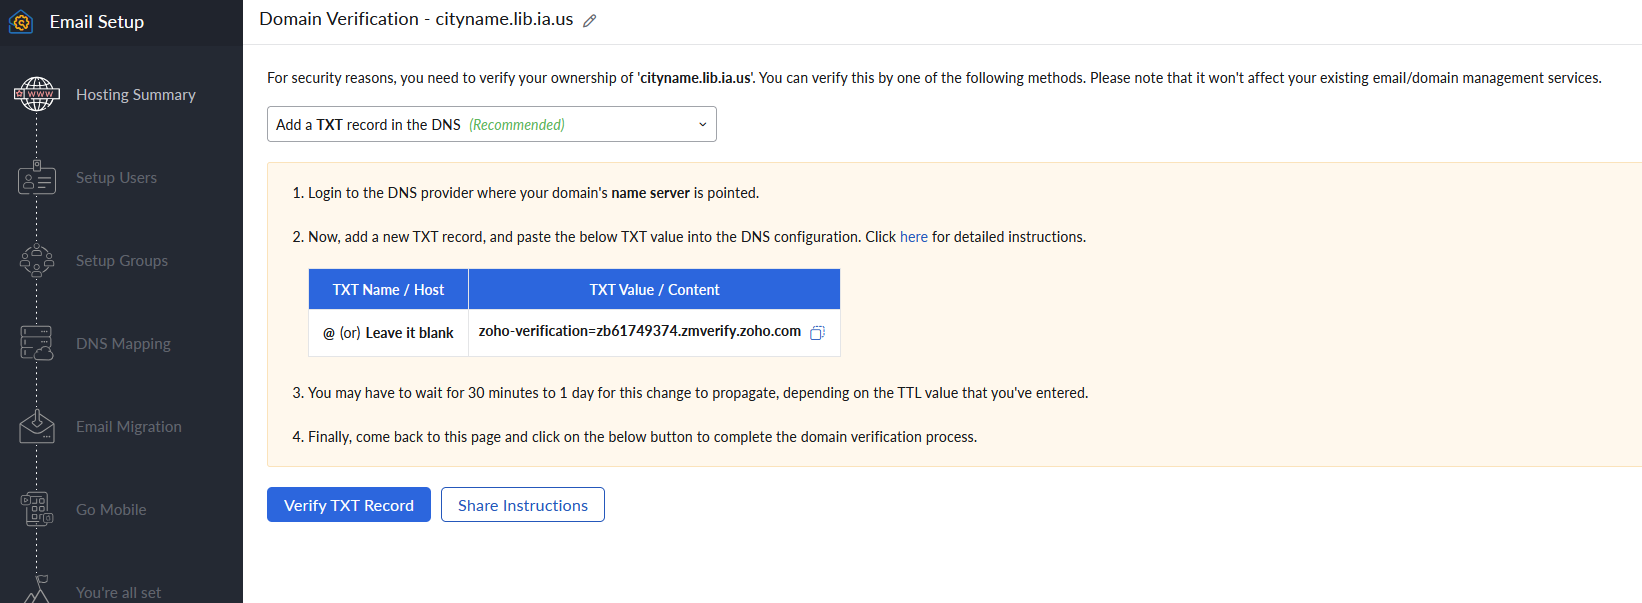
- Please cut and paste the information located in the TXT Value / Content field and send that to your LRT so we can update the DNS records properly.
- After we notify you the changes have been made to your account, click on Verify TXT Record.
Add users to your orginazation.
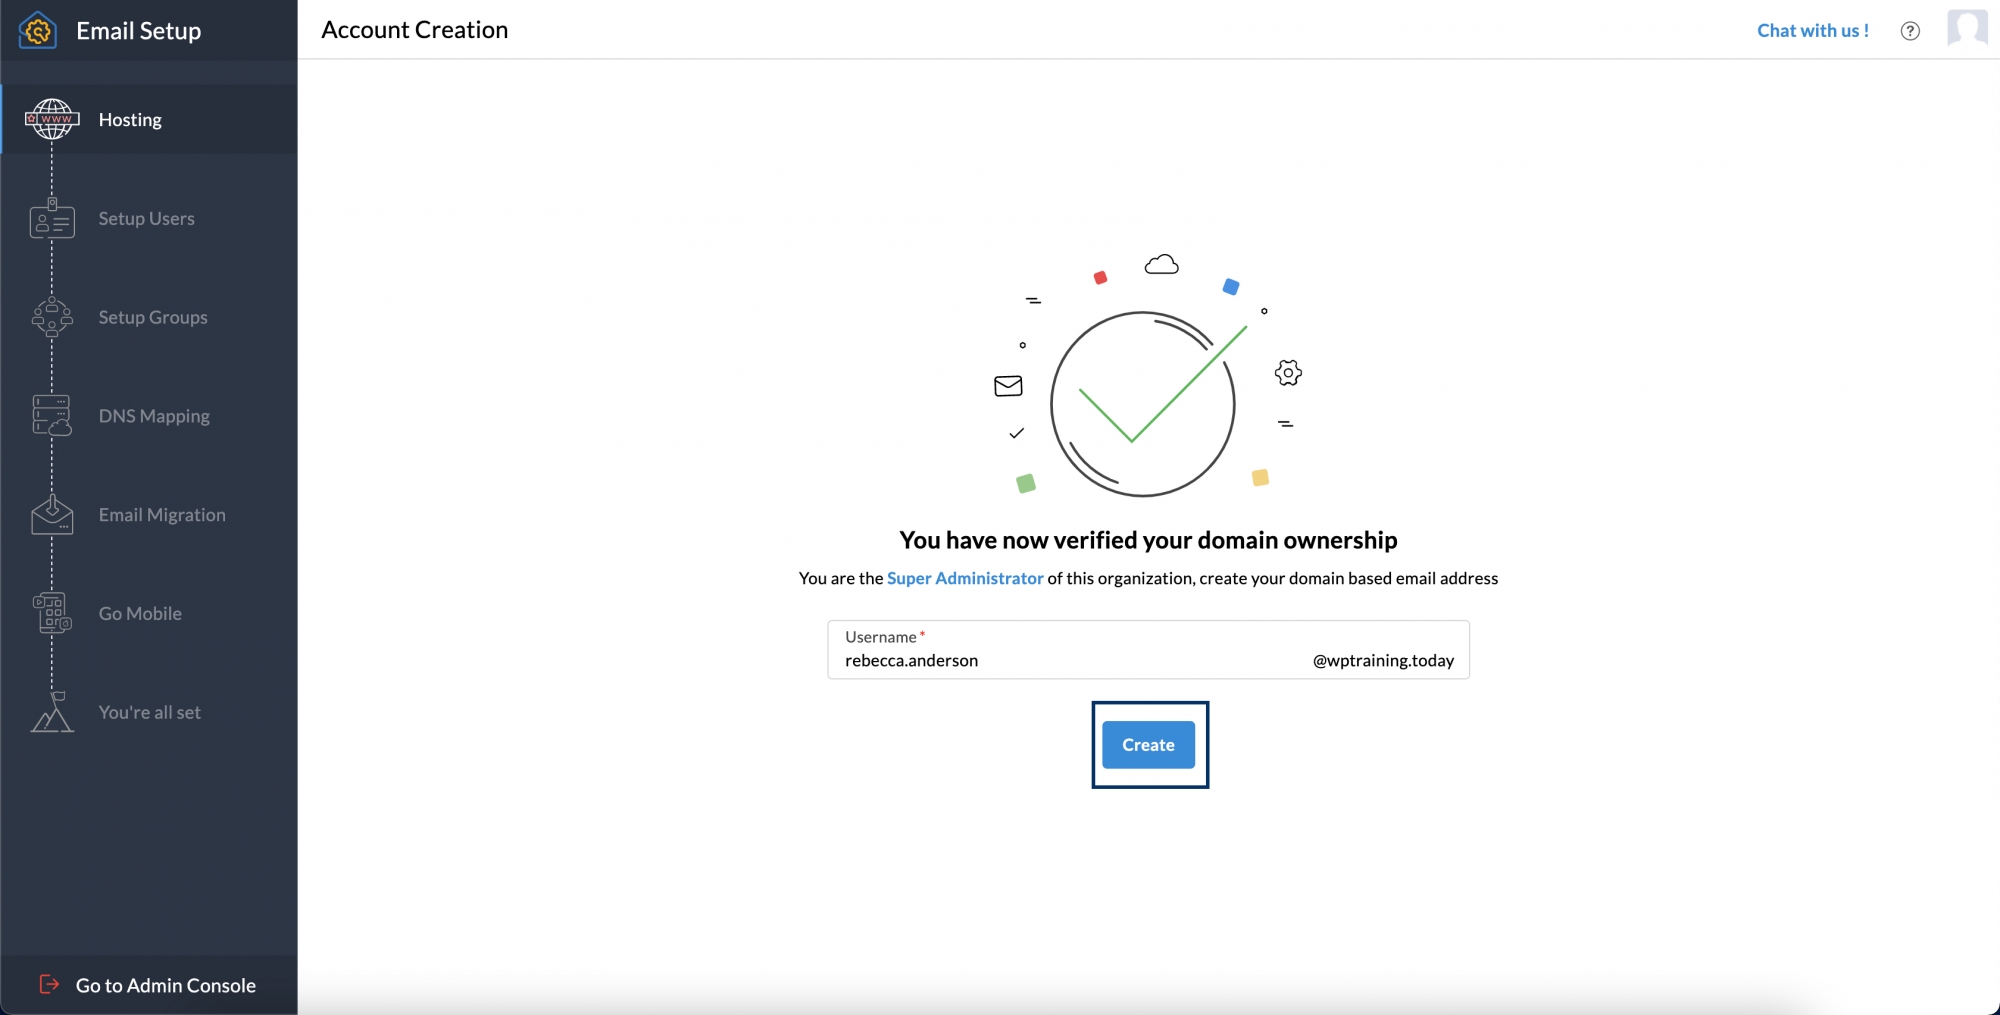
After successful domain verification, you will be asked to provide a name to create the first user of your organization. Note that the first user you create will become the super administrator by default. The super admin will have all the privileges across all users who are added to your organization.
- Upon giving the user name, click Create.
- After adding the super admin, you will be taken to the Users page where you can start adding users to your organization.
- Adding users in Zoho Mail can be done in multiple ways, depending on your convenience.
- Add Users one by one.
- Invite a user to be a part of your organization.
- Note: When you add a user, you are creating an individual account for them in your organization. You will be providing the user with a unique professional email address and password using which the user can access their account.
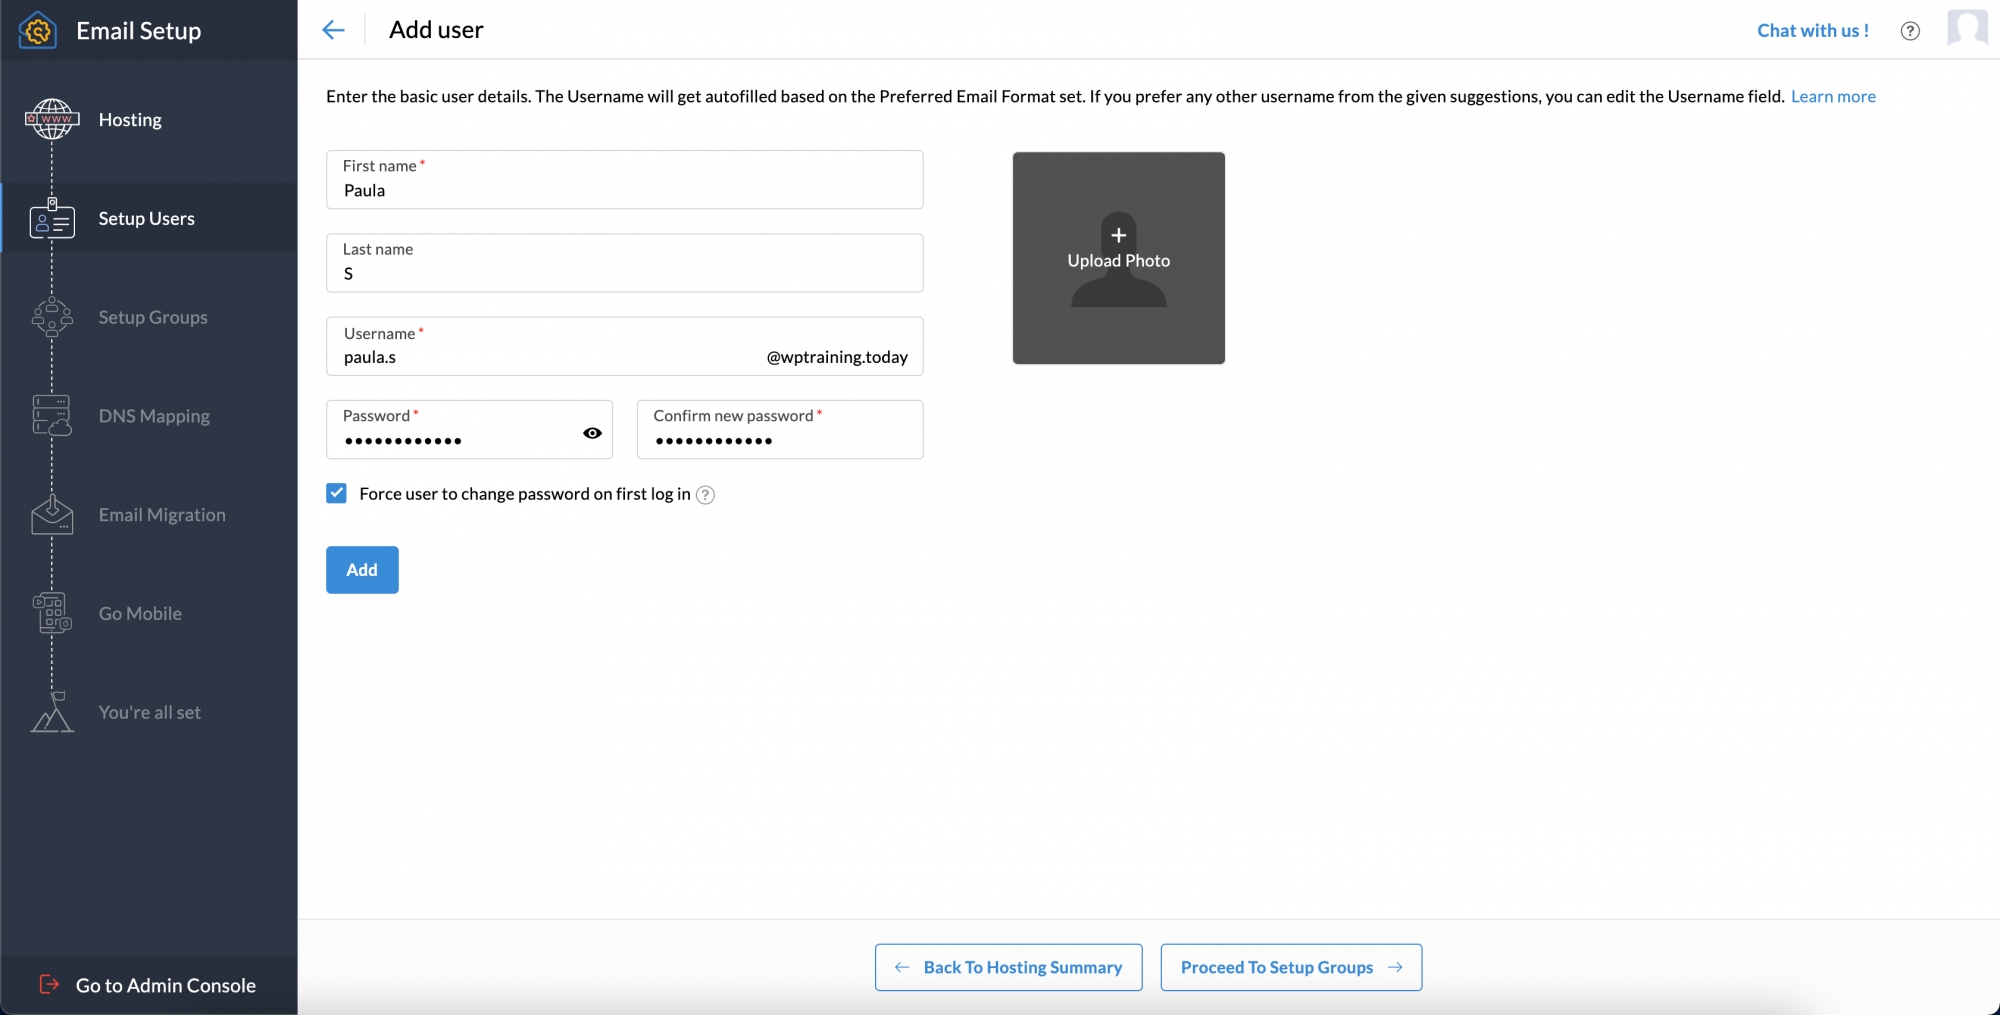
- Add User(s). Click the Add button.

- Enter the desired first name, last name, and username. You will also be required to provide a password, using which the user can log in later.
- You can also check the Force user to change the password during the first login option, according to your security requirements.
- Click Add to finish creating the user account in your organization.
- Redo the same steps to add as many users as you need.
- You can also check the Force user to change the password during the first login option, according to your security requirements.
- If you check the above option, the user will be prompted to change the password of their account during their first login attempt. The user will not be able to enter or access their account before changing the password.
- You can also check the Force user to change the password during the first login option, according to your security requirements.
Migrating AtMail Contacts to Thunderbird
Move Contacts from Webmail to Thunderbird
Thunderbird is a free email application that’s easy to set up and customize. These are the instruction for importing your email contact's from SILO's webmail mail to Thunderbird's email application. Unlike email, contacts are not kept in sync. They are treated as completly different entities. Once you have imported them from webmail to Thunderbird, you will need to add and delete them seperately.
1. Log into webmail, click on the box tiles and select Contacts.

2. Select "Export" to export contacts.

3. Select which Contacts you would like to export and click OK. In this example we are exporting all contacts.

4. Save the export in a location that you will be able to find to import into Thunderbird.

Now it is time to import the vCard file (.vcf) that was created into Thunderbird.
1. Select Address Book from the top toolbar of Thunderbird. This will open the Address Book in a new tab.

2. Select Tools then Import from the open Address Book window or tab.

3. Select the Address Books radio button and then click <Next>

4. Select vCard file (.vcf) format and click <Next>

5. Navigate to where the file (vCard file) you created from webmail is located and select it. Click <Open>

6. Your contacts will import and you will get the success message seen below. Your contacts have now been imported.

Migrating AtMail Email Archive to Gmail
Move email from Thunderbird to Gmail.
- Set up your new Gmail account and enable IMAP.
- Sign into Gmail with the credentials, such as email id and password. Make your way toward the upper right and click on the Setting Icon.
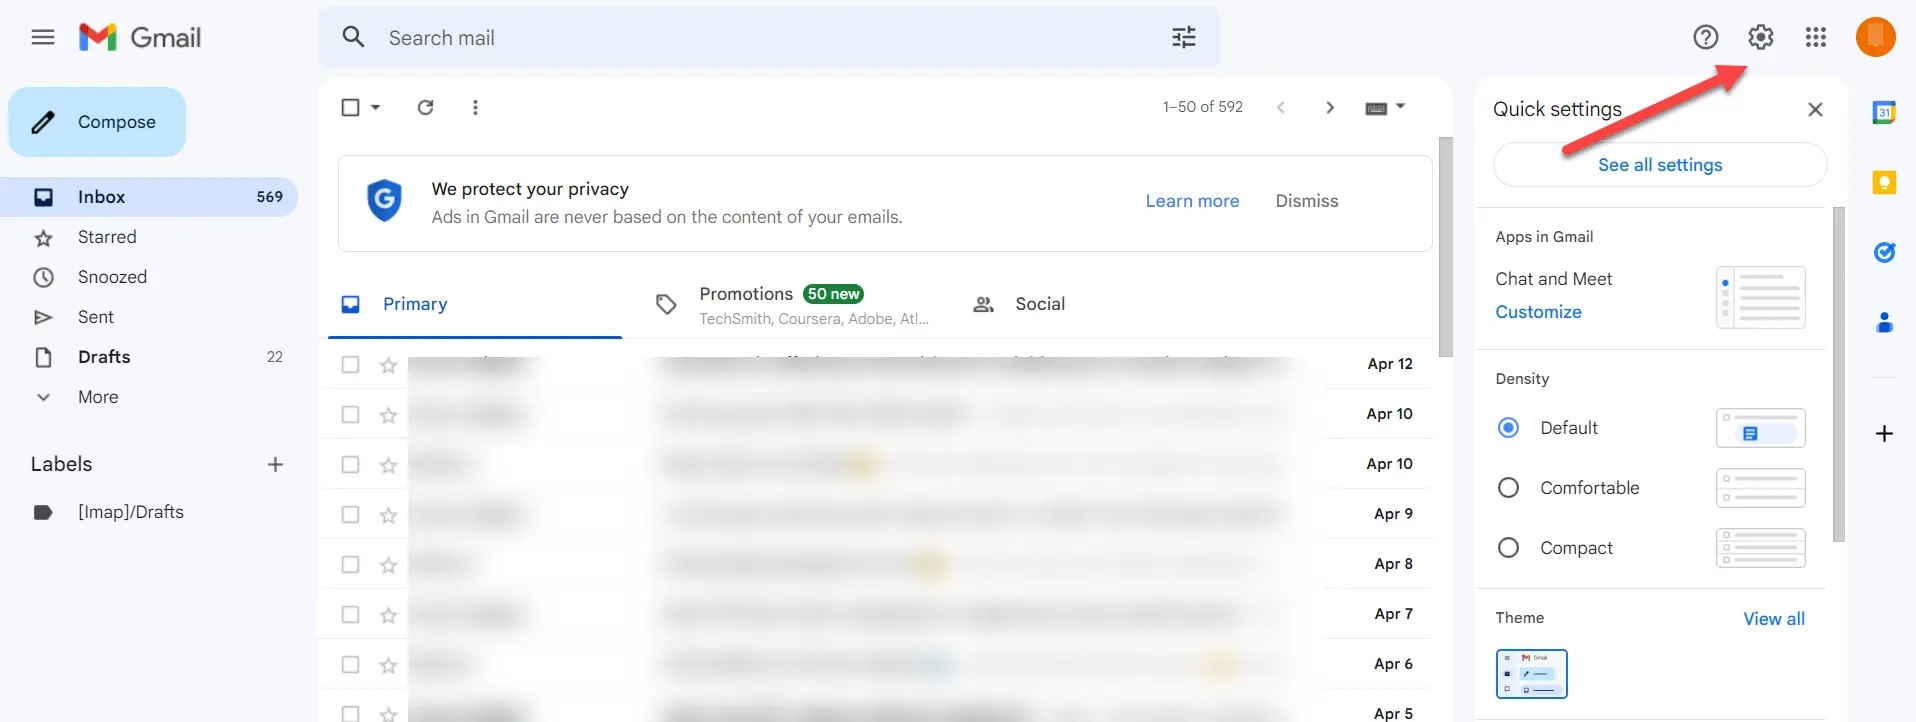
- Once you click on the setting gear icon, press on See all Settings.
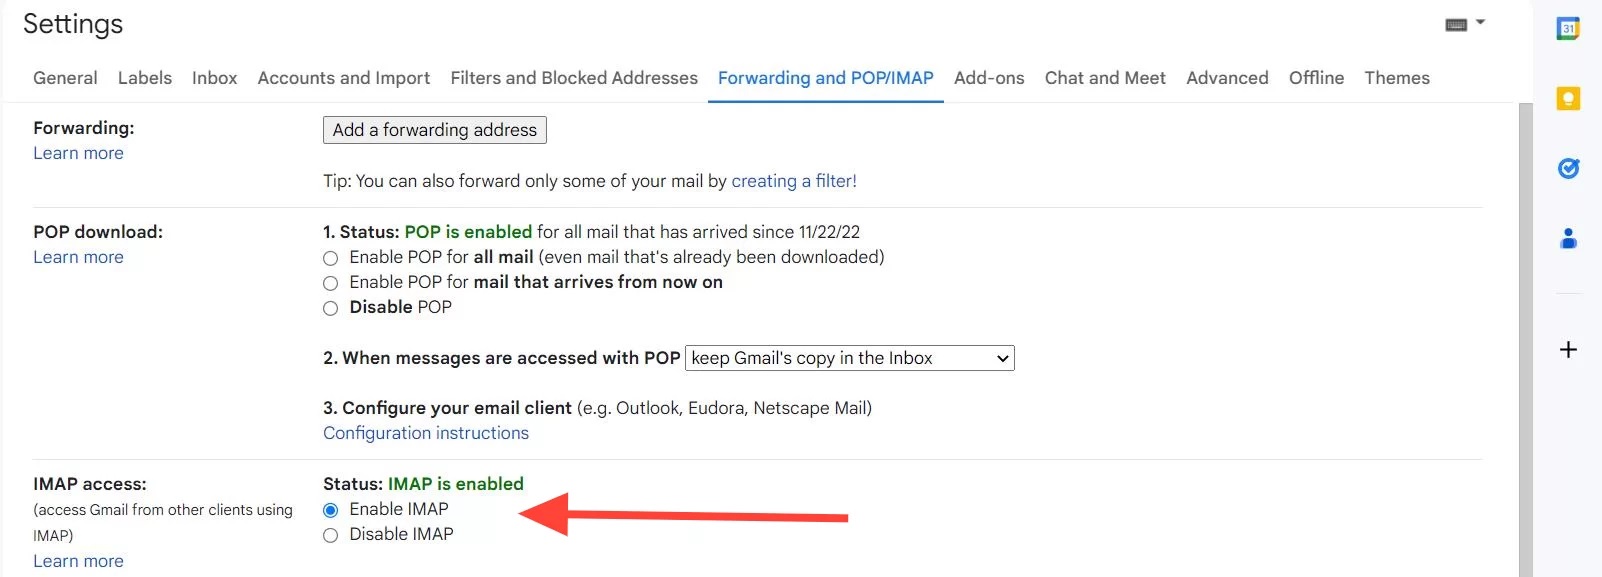
- On the Setting page, click Forwarding and POP/IMAP, and then enable IMAP. Be sure to hit Save once selected.
- Sign into Gmail with the credentials, such as email id and password. Make your way toward the upper right and click on the Setting Icon.
- Next, make sure you have set up Thunderbird with your atmail email account (directions under "Thunderbird" tab above)
- Now add your Gmail account to Thunderbird.
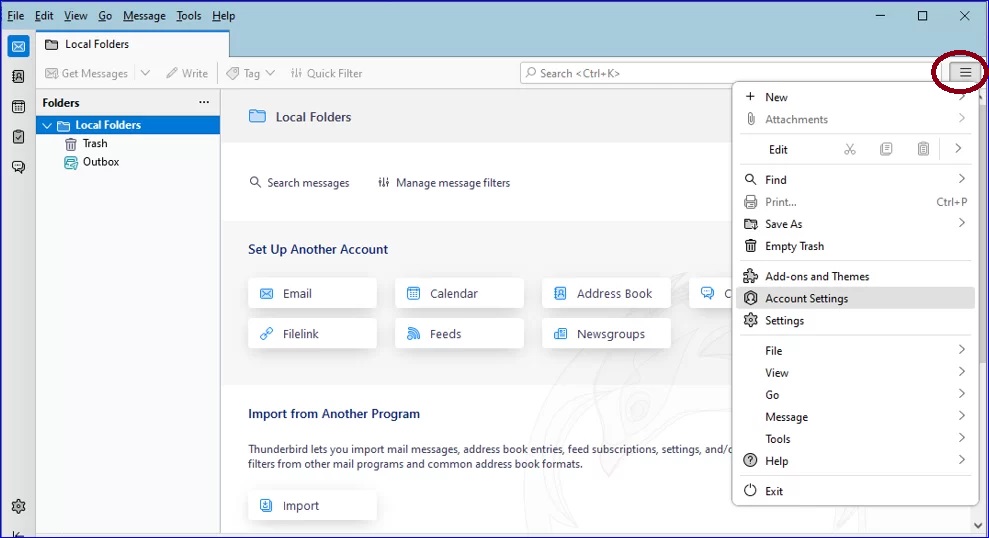
- Log into Thunderbird. Click on the Setting icon (3 vertical line on the top right, in red circle) and then select Account Settings.
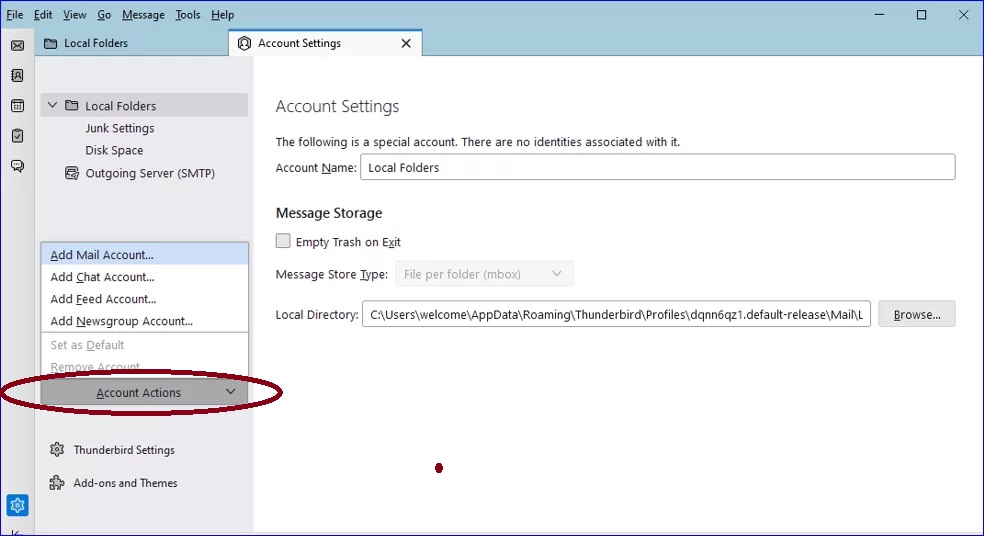
- A page will open. On the left side click on Account Actions (circled in red). It will open up a pop up box with several options. Click on Add Mail Account...
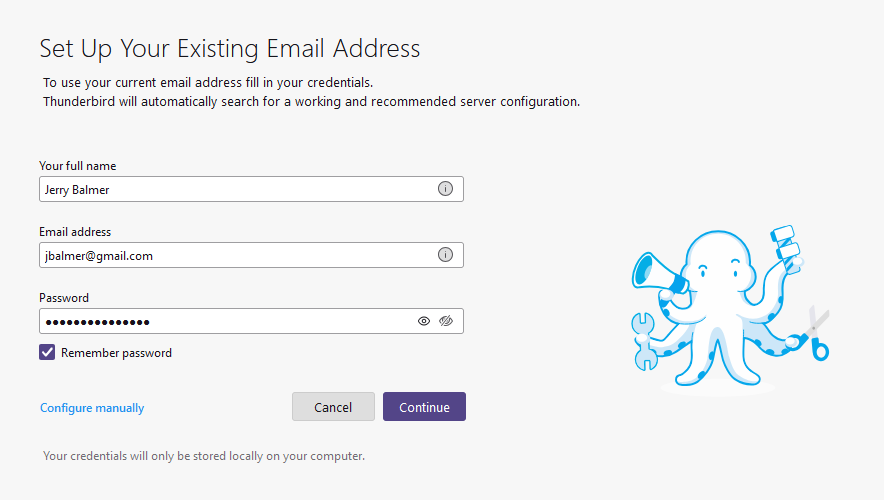
- Users will be redirected to the new window to add a Gmail account. After entering details such as full name, email id, and password, press continue.
- Click on the IMAP option (should be the default) to sync emails on the server, and then click on done.

- After that, login page of Gmail will open. Click on the Finish button and you are done.
- Log into Thunderbird. Click on the Setting icon (3 vertical line on the top right, in red circle) and then select Account Settings.
- You will now be able to drag messages from your atmail account to the location you want them in the Gmail account. Note, dragging the messages will move them. If you want to copy them, be sure to right click and select "Copy to" option.
Migrating AtMail Email Archive to YahooMail
Move email from Thunderbird to Yahoo.
- Make sure you have set up Thunderbird with your atmail email account (directions under "Thunderbird" tab above)
- Now add your Yahoo account to Thunderbird.
- Log into Thunderbird. Click on the Setting icon (3 vertical line on the top right, in red circle) and then select Account Settings.
- A page will open. On the left side click on Account Actions (circled in red). It will open up a pop up box with several options. Click on Add Mail Account...
- Users will be redirected to the new window to add a Yahoo account. After entering details such as full name, email id, and password, press continue.
- Click on the IMAP option (should be the default) to sync emails on the server, and then click on done.
- After that, login page of YahooMail will open. Click on the Finish button and you are done.
- Log into Thunderbird. Click on the Setting icon (3 vertical line on the top right, in red circle) and then select Account Settings.
- You will now be able to drag messages from your atmail account to the location you want them in the YahooMail account. Note, dragging the messages will move them. If you want to copy them, be sure to right click and select "Copy to" option.