Content Information
On this page...
Structure is critical for adaptive technology users, who rely on properly formatted headings to understand and navigate webpages and documents. Without a heading structure, the webpage or document is read as one long section of text.
Back to topOrganized Structure
The structure of a webpage should convey the content’s hierarchy through headings and subheadings. Webpages that use a properly-formatted heading structure allow adaptive technology tools to skip through sections, calling out only the headers, to help users more quickly locate the information they’re seeking.
An organized structure with headings and subheadings makes it easier for all readers to scan, whether they rely on assistive technology or not. A solid structure also helps improve your website’s search engine results, which use headings to identify context and keywords when crawling the web.
Structure Tips
- Think of headings and subheadings like the outline of a document.
- Headings and subheadings should be short and descriptive.
- Rather than large blocks of text, use brief paragraphs and bulleted lists between headings and subheadings.
Heading Ranks
Headings are nested by their rank. The most important heading has the highest rank of Heading 1, or H1. Heading levels go from the most important (H1) down the least important rank of Heading 6, or H6.
Headings with an equal or higher rank start a new section, headings with a lower rank start new subsections that are part of the higher ranked section. Organize your text under brief but descriptive headings, and apply the website’s built-in styles to the headings and subheadings of your webpage.
Back to topTips for Headings
- Use Heading 1 to describe the main topic or purpose of each page. This heading should only be used once as the webpage title.
- Use Heading 2 to indicate main sections of the webpage.
- Use Heading 3 to indicate sub-sections.
- Use Heading levels 4, 5, and 6 to indicate sub-sub-sections, and so on.
- It is not recommended to skip heading levels, such as going from H2 to H4. Follow the proper hierarchy of headings for your content.
How to Apply Headings
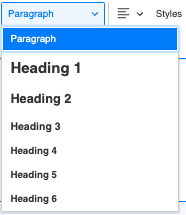
In most website platforms and software applications (including Word and Google Docs), headings are applied through a style menu on the formatting toolbar.
Highlight the text you want to make a heading, look for the Paragraph drop-down menu, then click the heading level you want to apply.
Note that heading styles are built into the backend of the system and must be changed by a website administrator. They are applied site-wide and cannot be changed for individual webpages or blocks of content.
Back to topAdditional Resources
- Understanding WCAG 2.1: Headings and Labels (Level AA)
- Page Structure Tutorial: Headings
- 7 Core Accessibility Skills: Headings (University of Minnesota Office of Accessibility)
- Accessibility Bytes No. 6: Document Headings (Section 508 Compliance)
PLOW Website Instructions
Concrete5 includes a built-in heading structure. In some instances, Concrete5 may skip a heading level, going from Heading 1 (H1) to Heading 3 (H3). This will be flagged by accessibility scanners and is not ideal for screen readers and other assistive technology.
If a heading level was skipped on a webpage, you can adjust the hierarchy within the content block.
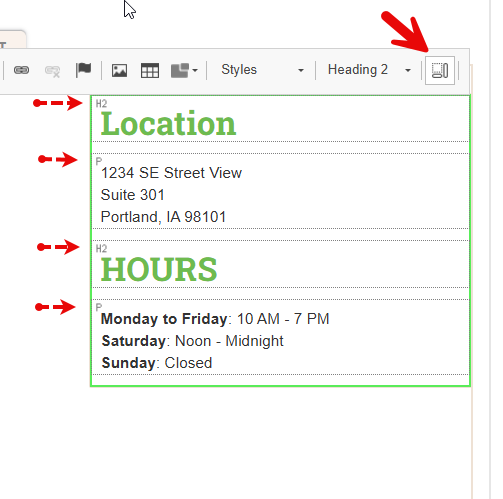
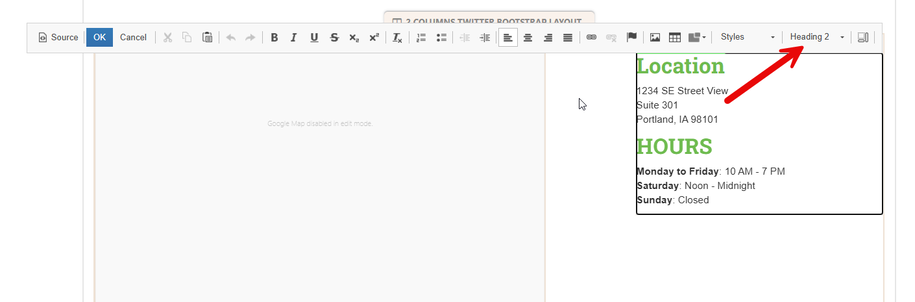
Click on the content area you want to adjust, then click on Edit Block.
In the edit settings, on the far right side, select the drop down to adjust the heading level.
Once you have selected the desired heading level, click Save and publish changes.
Preview Rank of Content
You can also preview how content is ranked by clicking on the structure button in the corner of the editor. This will give you a better idea of how screen readers will assign the webpage information within the content block.